[et_pb_section bb_built=”1″][et_pb_row][et_pb_column type=”4_4″][et_pb_text _builder_version=”3.12.2″ text_font_size=”11px”]
Disclosure: This shop has been compensated by Collective Bias, Inc. and its advertiser. All opinions are mine alone. #PrepSealSave #CollectiveBias
[/et_pb_text][et_pb_image _builder_version=”3.12.2″ src=”https://www.kansascitydietitian.com/wp-content/uploads/2018/11/10738392720_IMG_3071.jpg” /][et_pb_text _builder_version=”3.12.2″]
A few weeks ago we were visiting some friends. I offered to help her in the kitchen and gave the disclaimer that I probably had about a minute and a half of uninterrupted time to help. Sure enough less than 2 minutes later my 1 year old was at my feet begging to be picked up. Having a 3 year-old and a 1 year-old my ability to dedicate my sole attention to making dinner is unlikely. I know this sounds crazy but to prep dinner for eating around 5:30 or 6 I usually start about 4, and that is for those recipes that promise they are ready in 30 minutes or less. Those unending amounts of urgent “MOM” pleas prevent me from making a thirty minute recipe in anything short of two hours. During the holidays when we are trying to watch a budget a little closer and be prepared to serve a few extra mouths if the occasion calls for it, I love to make a few go to dishes and freeze them, one of my fall favorites is Butternut Squash Enchiladas, but I don’t have a ton of space and to freeze a casserole can be a little tricky. Today I’m sharing my tips for freezing my butternut squash enchiladas or your favorite dishes so they will be ready for your busy holiday season:
[/et_pb_text][/et_pb_column][/et_pb_row][et_pb_row][et_pb_column type=”1_2″][et_pb_text _builder_version=”3.12.2″]
How to Freeze Casseroles:
- Place wax paper in the bottom of your casserole dish, layer your food into the dish and cover with plastic wrap tightly and then with foil. Note: I like to use the dish I will cook it in, so usually I use my 9 x 13 glass casserole dish which is safe for the freezer.
- If you are cooking something before freezing it, make sure your food is cool before putting in the freezer, this is better for your appliances and for food safety.
- Freeze overnight, then pop your casserole out of the dish. This allows you to keep your dish for other uses and saves you some space too! I used to just put an extra layer of plastic wrap around my casserole, but I found my food came out with so much freezer burn. I started using FoodSaver® FM3941 Vacuum Sealing System and FoodSaver® Bags and Rolls Value Pack to prevent this. After I freeze my casserole and pop it out, I put it in the FoodSaver® bags and seal it. This keeps my food freezer burn free and keeps it fresh 5x longer than my old go to of freezer bags or plastic wrap.
[/et_pb_text][/et_pb_column][et_pb_column type=”1_2″][et_pb_image _builder_version=”3.12.2″ src=”https://www.kansascitydietitian.com/wp-content/uploads/2018/11/JPEG-image-7051B3CD6502-1-1.jpeg” /][/et_pb_column][/et_pb_row][et_pb_row][et_pb_column type=”4_4″][et_pb_text _builder_version=”3.12.2″]
A few extra things to keep in mind when deciding what types of foods to freeze. Don’t pick any vegetables with a high water content like lettuce or cucumbers. If your dish includes meat you will want to cook that before freezing, but other ingredients can often remain raw, like lasagna noodles. Make sure to label your casserole well with directions for how to prepare so that it doesn’t get lost in the bottom of your freezer.
The FoodSaver® System includes vacuum seal bags, vacuum zipper bags and containers designed to work together with vacuum sealers for optimal performance. You can also use it to marinate meat quicker and even cook meat through the sous vide method. By taking all of the air out, you can ensure your meat will be cooked evenly throughout.
Want to try it out for yourself? I got mine at Costco, and they are having these specials in the month of November:
- The FoodSaver® FM3941 Vacuum Sealing System will be $40 OFF in November (must have Costco membership).
- FoodSaver® Bags and Rolls Value Pack will be $10 OFF in November (must have Costco membership)
[/et_pb_text][et_pb_text _builder_version=”3.12.2″]
- 1 Pound Butternut Squash
- 2 teaspoons olive oil
- 1 Onion, Diced
- 1 Chipotle Pepper in adobo sauce reserve adobo sauce, and chop chipotle pepper
- 3 Oz cream cheese
- 1 teaspoon cumin
- 3 Green onions, chopped
- 16 oz Enchilada Sauce
- 15 oz black beans, drained
- 8 oz ground beef, cooked optional
- 1 package white corn tortillas
- 1 cup shredded Mexican cheese
- Put butternut squash in a large stockpot and fill with enough water to cover the squash. Bring water to boil, and cook until squash is soft, when pierced with a fork about 20 minutes. You may need to rotate the squash from time to time to ensure even cooking.
- Meanwhile, in a medium skillet heat oil over medium-high heat. Saute onions until soft. Add garlic, chipotle, and adobo sauce. Saute until fragrant, another minute or two more.
- Remove the squash and cut in half lengthwise, and scoop out seeds. Cut squash into 1 inch or smaller cubes and add to a large bowl. Add onion mixture, ground beef (if using), black beans, cream cheese, cumin, and green onions. Stir well.
- Line a 9x13 baking dish with wax paper. Spread 1/3 of the enchilada sauce on the bottom of the dish and spread into a thin layer.
- Scoop about 1/4 cup of filling into each tortilla and loosely roll. Place seam side down in the baking dish. Cover with plastic wrap and then foil. Freeze. For best results, remove dish after freezing overnight, enchiladas will easily pop out and can be moved to a vacuum sealed bag with FoodSaver® FM3941 to keep it fresh even longer.
- To use FoodSaver® FM3941, turn the lever to open and pull out the roll to measure out how long the casserole is making sure to leave roughly 4 inches of space. Turn the lever to closed. Press the seal button and when the light turns off, cut the bag.
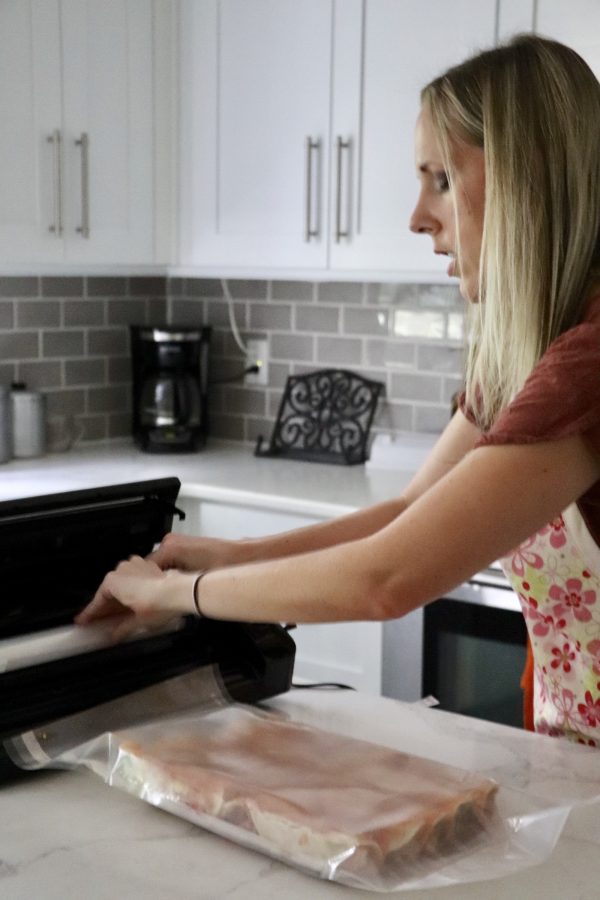
- Place the frozen enchiladas inside the bag, make sure the bumpy side on the sheets are on the top.
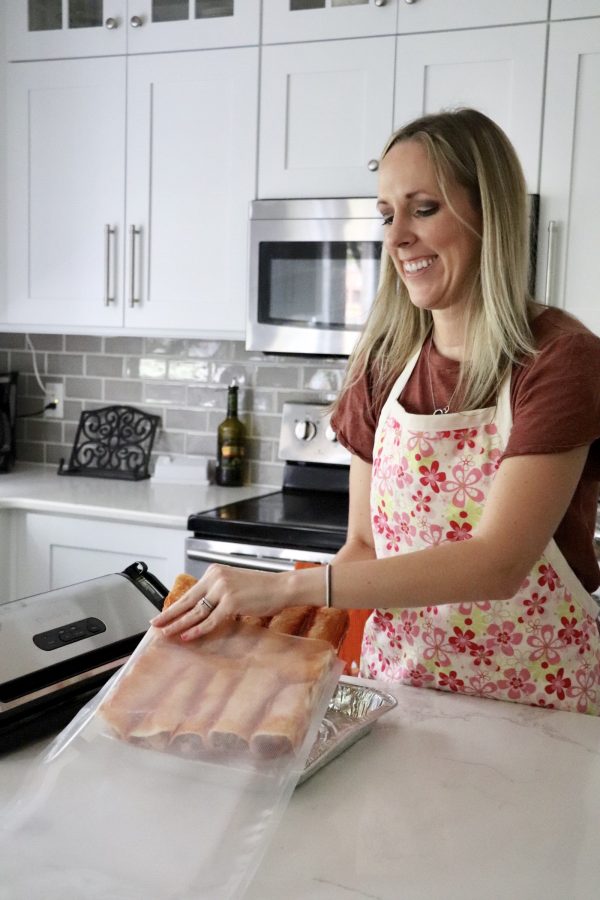
- Slide the open end into the opening and press vacuum seal.
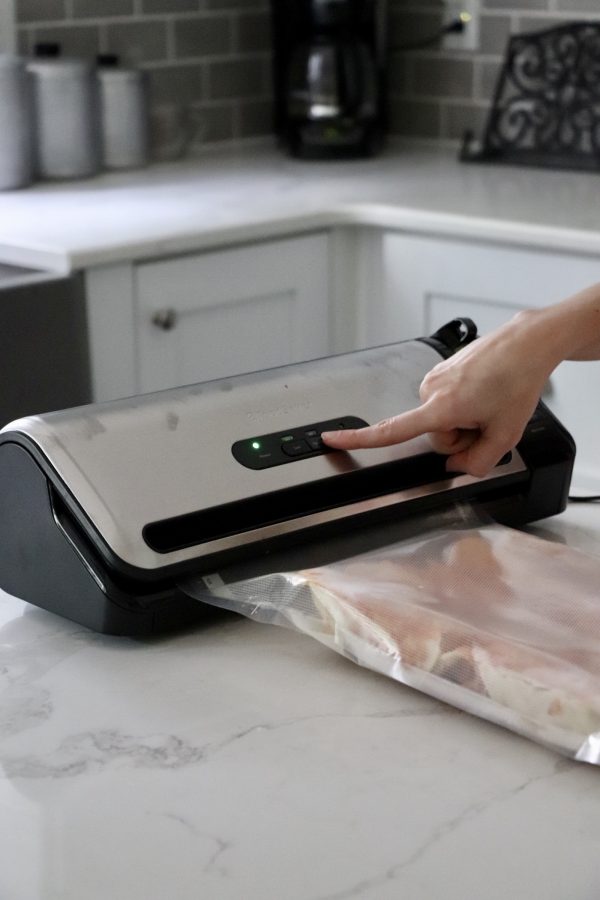
- This will be noisy for a few seconds and you will see all the air get sucked out. Then it will seal it and you can pull it out and freeze it. Be sure to label it with what it is, what temperature to cook it at and for how long.
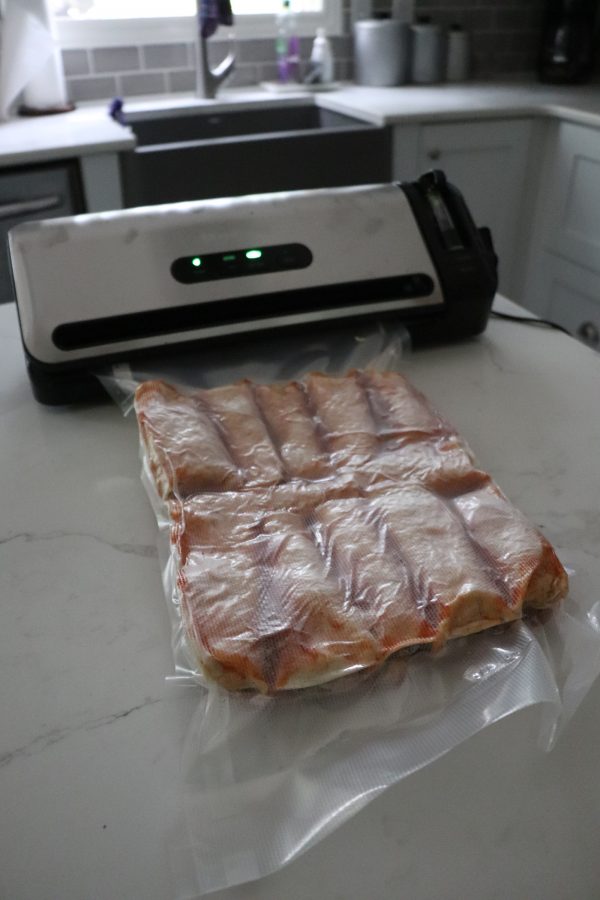
- Follow the same steps to vacuum seal remaining enchilada sauce separately and freeze.
- On the day before you want to cook, remove the frozen dish and set in the refrigerator to thaw overnight. On Cooking Day: Preheat oven to 350 degrees.
- Remove enchiladas from FoodSaver® sealed bag and put into 9x13 dish. Spread thawed enchilada sauce evenly over enchiladas, cover with foil. Bake for 15 minutes in preheated oven.
- Remove foil and top with cheese. Cook for 15 more minutes or until cheese is melted, enchiladas are warmed through and bubbly.
[/et_pb_text][et_pb_image _builder_version=”3.12.2″ src=”https://www.kansascitydietitian.com/wp-content/uploads/2018/11/Copy-of-Copy-of-How-toDIY-Your-Whole-Wedding.png” align=”center” /][/et_pb_column][/et_pb_row][/et_pb_section]
